

How To Make A DIY Princess Poppy Troll Inspired Costume For Less Than $4

How To Make A DIY Princess Poppy Troll Inspired Costume For Less Than $4
The Trolls Movie
The Trolls Movie came out last year during the 2016 holidays season.
Since then, my daughter has been head over heels in love and still, can’t stop talking about it!
All of the characters in this movie look so colorful and cuddly covered with felt and glitter, how can any normal kid not go bananas?
Don’t even get me started on all those cool songs and hippy-dippy dance moves, lol.

What’s not to love?
It is sheer sensory overload for any kid.
She has seen this movie a grand total of 25 times in counting and does not plan to stop watching it anytime soon.
I believe she knows every song and can recount every dance move from beginning to end.

So of course, she had to be Poppy for Halloween this year!
As if there was ever any doubt about that!
Out of curiosity, I did some research to see if it would be worth it to buy a Poppy costume or to attempt another DIY project.
A brand new flimsy costume from Target was going to cost me $25 before taxes and the wig would be an extra $10, also before taxes.
If you are short on time and can swing the cost, you can check them all out over here,
Poppy The Trolls Movie Costumes.
However, I would caution you against the flimsy quality, like those that we saw from Target.
But as for me, I just can’t justify spending so much on for something she might not like later on. Ouch! ?
Sorry, not going to pay that for something she is likely going to wear just once, smh.
Instead of shelling out more than $35, I decided to attempt another one of my DIY skills on this new little pet project of mine to see if we can get it done much cheaper.
And guess what?
It’s totally doable!
Want to make your own Princess Poppy The Troll Inspired Dress too?
Scroll down below to download a free printable pattern template.
It’s like a bad case of Deja Vu, but instead of making over my son, I am doing it for my daughter this year! lol
Here’s what I did:
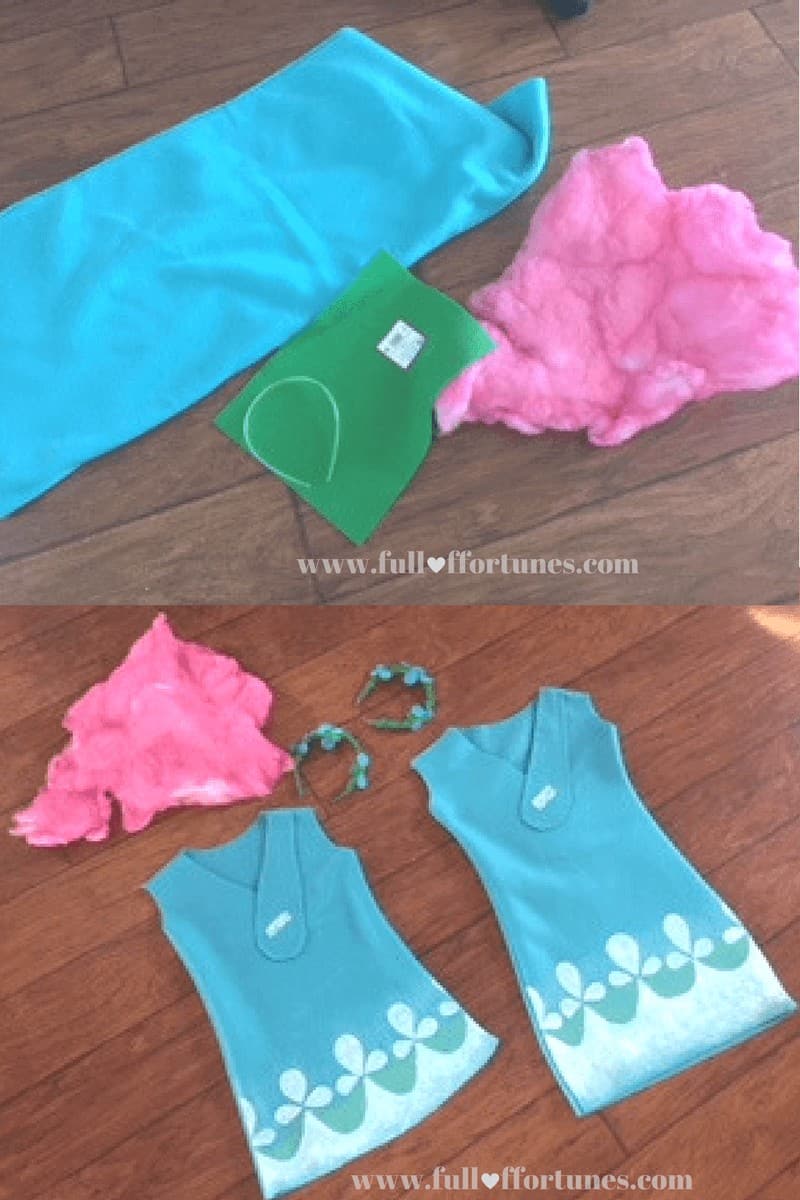
On one of my random visits to Joann Fabrics this month, I happen to discover that there was a sale on blizzard fleece, which, coincidentally, bears a really close resemblance to all of the felt material and scrapbook feel of the Trolls Movie.
And at 50% off the regular price of $8.99/yard, making it $4.49, I thought it would be worth it to give it a try and make poppy’s famous blue dress.
I also picked up a sheet of green felt for $0.25 to make her headband and found pink fabric spray paint on clearance for $1.97 to make her hair.
The total cost of this project was $7.21 for 2 dresses and headbands!
However, instead of only one Poppy costume, I was lucky enough to have enough material to make 2 of them!
Since my daughter and her friend, both love Poppy, I was able to surprise them both with a Poppy costume.
This makes each costume (dress, headband, and wig included) cost just $3.60 per kid, which is a win for me! 🙂
If you’d like to make your own DIY version of a Poppy costume for your little one, here is what you will need.
List of materials:
- pink fabric spray paint
- 1 sheet of green felt
- 1/2 yard of turquoise blue blizzard fleece (depending on your child’s dress size)
- a well-fitting dress (to use as a template to trace around) already have
- tape measure (already had on-hand)
- white sewing chalk (already had on-hand)
- sewing scissors (already had on-hand)
- sewing machine with white thread (already had on-hand)
- sewing pins (already had on-hand)
- white acrylic/fabric paint (already had on-hand)
- white sidewalk chalk (already had on-hand)
- green sidewalk chalk (already had on-hand)
- fake snow blanket (the kind that used to cover the bottom of a Christmas tree)- already have
- pink long sleeve/hoodie sweater (already had on-hand)
- pink leggings (already had on-hand)
- pink boots (already had on-hand)
- pink glitter makeup/lipstick (already had on-hand)
- scrap pieces of cardboard to protect the fabric and your table from paint (already have)
- cup of water (already had on-hand)
- small sponge (already had on-hand)
- small detail paint brush (already had on-hand)
- plastic headband (already had on-hand)
- hot glue gun (already had on-hand)
- This was a project fit for the trolls as the majority of it involved cutting and gluing, just like Poppy’s scrapbooking! 🙂
Directions for the headband and wig:
- Take the snow blanket outside and spray paint it pink.
- Be sure to place it inside of an open cardboard box to keep the color from spreading and to control the smell.
- Warning: It smells atrocious! ?
- Follow the direction on the spray paint can.
- Spray paint one side and wait about an hour or so until it is dry to the touch.
- Then flip it over and spray the other side.
- Let it dry overnight.
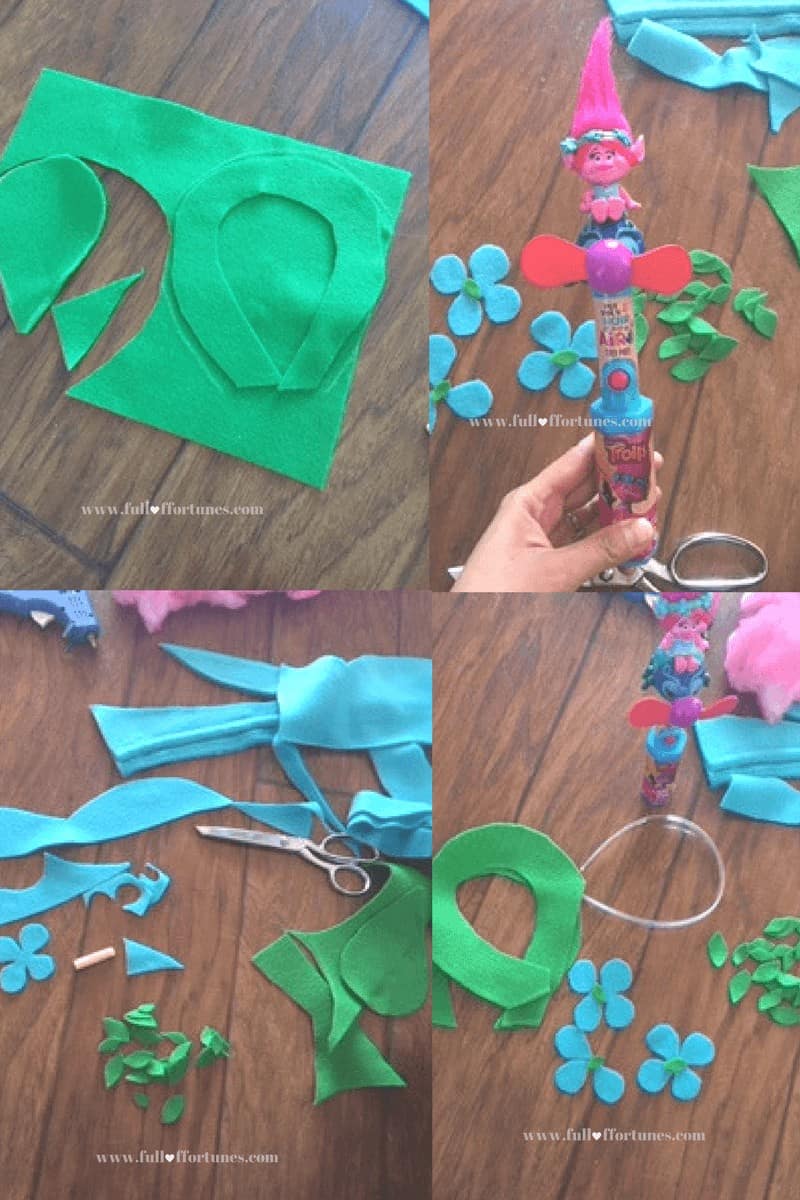
- Take a plastic headband (the multipack from the Dollar Tree store) and trace it onto the green felt.
- Cut out the traced pattern of the headband and hot glue it onto the plastic headband covering its entirety with green felt. Let it dry.
- Cut out several pieces of leaves in varying sizes with the leftover pieces of green felt.
- Cut out several pieces of petals in varying sizes with the leftover pieces of turquoise blue fleece material.
- Assemble the leaves and petals to make two small flowers on the top left of the green headband and one small flower on the top right of the headband using hot glue. Let it dry.
- Now that the snow blanket is dry and pink, tease it into the best fitting shape and size of your child’s head.
- Then hot glue the pink fuzz, piece by piece onto the headband until you’re happy with its placement and shape.
- You are done, girlfriend!
- Snap a pic of your new Poppy Troll Wig!

- I used my daughter’s 5T cheerleader dress as a template and added another 4 inches to extend the hem of her Poppy dress so that she can wear it many more times after Halloween. The girl loves to play dress-up with her friends!

Directions for making the dress:
- Find a sleeveless dress that fits your child well and place it on top your folded turquoise blue fleece.
- This will be your template, trace the outline of the dress onto the fleece using sewing chalk.
- Make sure to leave a 1″ allowance all the way around your pattern for seam lines.
- Take the turquoise blue fleece and fold it in half lengthwise.
- This will give you 2 layers for the front and the back of Poppy’s dress.
- With sewing scissors, cut through the 2 layers of fleece.
- Take the top layer and cut out a v-neck.
- This will be the front of the Poppy Dress.
- Leave the 2nd layer as-is, this will be the back of the dress.
- Pin the 2 layers together to keep them in place.
- I eyeballed and guestimated the size of the saddle-shaped strap that will go over the front left shoulder of Poppy’s dress and cut this piece out to attach it to the inner left shoulder when sewing it together.
- Then attach the strap alongside the left outer v part of the front of the dress using hot glue for a more finished look.
- Make sure your sewing machine is ready to go with white threading in place and sewing together the shoulders and the sides of the dress. (I used a zigzag stitch pattern because I do not have a serger.)
- Place a scrap piece of cardboard underneath the dress and trace the fleur de lis pattern onto the bottom hem of the dress on the front using the white sidewalk chalk.
- Using the chalk as a guide, go over the pattern using white acrylic paint and fill in the pattern with a detail paintbrush.
- Using a wet sponge, blend the white acrylic paint from the design to the hem of the dress to create an ombre effect at the bottom.
- Repeat steps 11-13 on the other side (back of the dress) at the bottom hem.
- Let each side of the dress dry for 3-4 hours.
- Paint a yarn clasp onto the saddle strap front closure of the dress.
- Using the green sidewalk chalk, trace a thicker line around the fleur de lis pattern and blend in with your fingers to create a greenish ombre effect around the pattern.
In Summary:
This was a super simple project that really did not require any special sewing skills, just straight lines.
You can even use fabric glue if you wanted to do so.
However, I just happen to have a sewing machine at home and I wanted to test my memory of how to thread it if I ever needed to since it’s been so long since I’ve last used it.
And I’m happy to report that my old noggin’ still works despite the cobwebs! 🙂
As promised, here is the pattern template to create the white fleur di lis looking design on Poppy’s dress.


More from my site
 Roundup: 25 DIY Halloween Wreath Ideas To Celebrate Halloween
 How To Get Your Kids Back On A School Schedule
 Cheap & Simple DIY Felt Succulent Wreath for $1.11
 Free Printable First Day of School Signs 2019-2020
 How To Not Go Insane While Traveling With Your Family
 10 Healthy Meatless Meal Ideas That Are Quick, Simple, & Cheap


On pattern for the dress, do you place the pattern piece on a fold?
Hi, Nancy, yes, I’ve placed the pattern on the fold so that I have a symmetrical piece for the front of the dress and the back of the dress too. Thanks so much for your question! 😃
Do you have a final picture of the costume to see how to hair piece goes on and everything on the pink? just trying to figure out how to tie it all in together! I can’t sew at all so I’m going to try to do the fabric glue and see how that works out!! Haha
Hi Allison,
Great question! Unfortunately, I do not have a close up of the hair piece. We have since donated them due to the move for another family to enjoy. However, we did run into the same problem.
And we discovered that using lightweight items sandwiched within the wig like straws, popsicles sticks, and bobby pins in the back of the wig helped stabilize it from the wind & general movement. Hot glue is a great idea! We also used a strong hairspray all over the wig to help keep the fibers from blowing awy in the wind. I hope that helps, enjoy your costume making! 🙂